Here is on how to add a button using the Interface Builder.
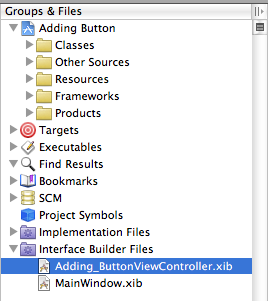
1. In Xcode in the Groups & File expand the Interface Builder Files (IB) then double click on the NIB file that defines the view to which view you want to add a button.
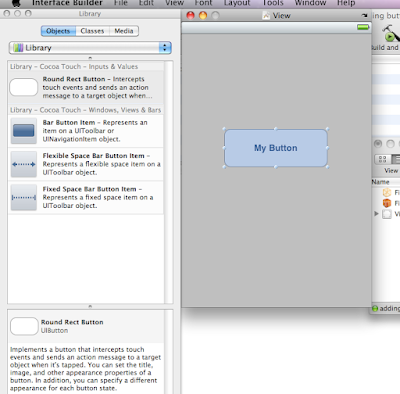
2. In IB, select Tools -> Library and drag a UIButton to the view. Resize the button and double click inside to put title "My Button".
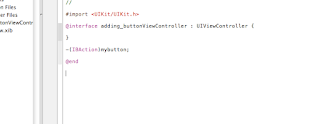
3. Go back to Xcode and on your .h file write this code
-(IBAction)mybutton;
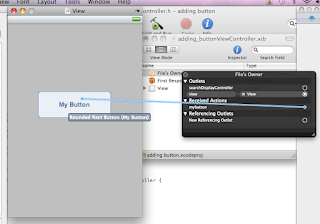
4. Back to IB then in File's owner under Receive Action connect "mybutton" on the UIButton that you created earlier.
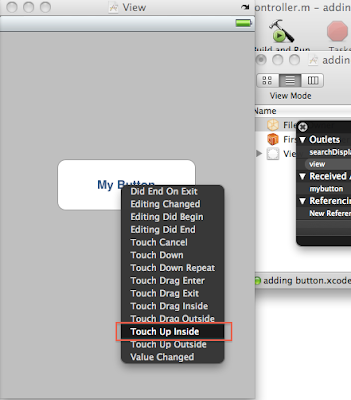
5. choose the "Touch up Inside option".
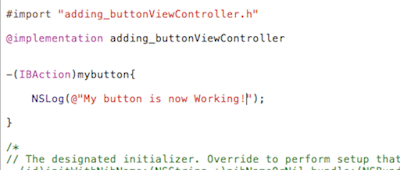
6. In Xcode in your .m file insert this code
-(IBAction) mybutton{
NSLog(@"My button is now Working!");
}
then Build and Run.
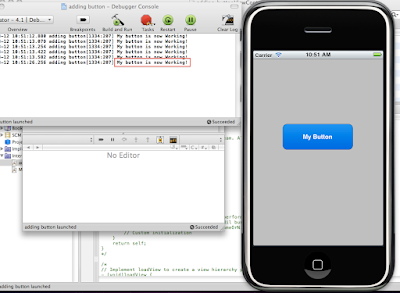
7. When you hit the button on the simulator the response appear on the debugger Console ("My button is now Working").

1. In Xcode in the Groups & File expand the Interface Builder Files (IB) then double click on the NIB file that defines the view to which view you want to add a button.

2. In IB, select Tools -> Library and drag a UIButton to the view. Resize the button and double click inside to put title "My Button".

3. Go back to Xcode and on your .h file write this code
-(IBAction)mybutton;

4. Back to IB then in File's owner under Receive Action connect "mybutton" on the UIButton that you created earlier.

5. choose the "Touch up Inside option".

6. In Xcode in your .m file insert this code
-(IBAction) mybutton{
NSLog(@"My button is now Working!");
}
then Build and Run.

7. When you hit the button on the simulator the response appear on the debugger Console ("My button is now Working").


